Ever wondered how to make an NFT and are eager to dip your toes into this revolutionary digital landscape? You're not alone!
September 27, 2023
How to Make an NFT Collection: 7 Essential Steps for Beginners in 2023
The NFT industry is expected to be worth a staggering $231 billion by 2030. If this is first NFT you’ve ever created, you've come to the right place.
In this guide, we'll walk you through the essential steps that will set you on the path to creating your very own NFT collection with Bueno’s NFT Generator from creation to mint. So, let's dive into the exciting world of NFT creation!
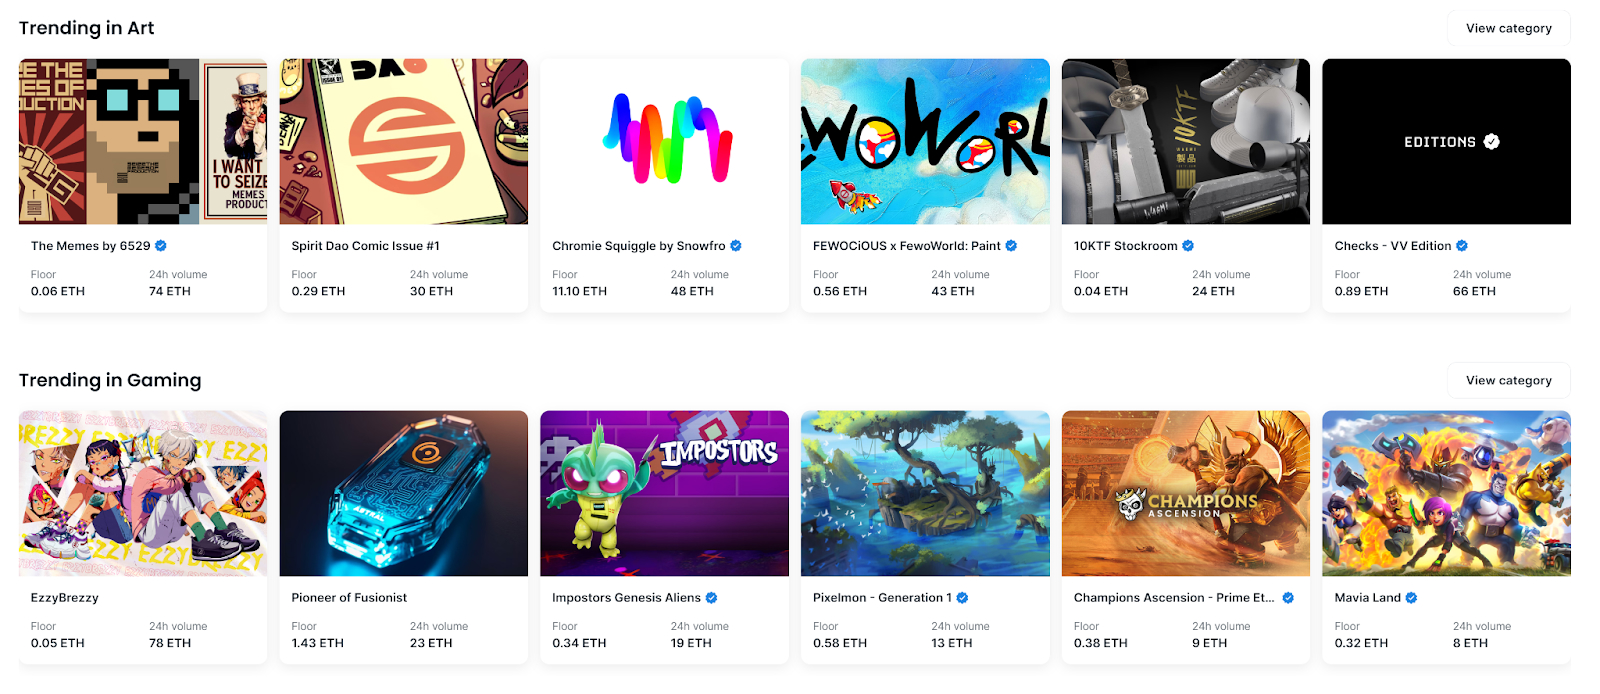
NFT types in categories on OpenSea. Credit: opensea.io
An NFT, or non-fungible token, is a digital asset that uses blockchain technology to establish ownership and authenticity of a unique item or content. An NFT can be any digital file, including:
- Art
- Trading cards
- Virtual worlds
- Music
- Photography
The blockchain ownership records are stored on a decentralized ledger, making it difficult to forge or manipulate. This has revolutionized the art and collectibles industry, allowing artists and creators to tokenize their work and sell it directly to buyers. At the same time, collectors can own and trade unique digital assets.
NFTs have gained significant popularity and have been associated with high-profile sales such as Everydays: The First 5000 Days sold for $69 million, the original “Doge” meme selling for $4 million, and Nyan Cat GIF, which sold for around $690,000.
How to Make an NFT: 7 Steps from Creation to Mint
Here is how to make an NFT from creation to mint:
- Determine the Type of NFT to Create
- Get a Crypto Wallet
- Add Cryptocurrency to your Wallet
- Make your NFT collection
- Create a Smart Contract
- Customize Your Mint Page
- Mint Your Tokens
Step 1: Determine the Type of NFT to Create
Deciding what type of NFT to create involves considering your interests, skills, and market demand.
NFTs can encompass various digital collectibles:
- Generative art collections (otherwise known as PFP collections)
- Open editions
- Limited editions
- Others (digital trading cards, virtual pets, in-game assets, and virtual fashion items, POAPS, virtual real estate, etc.)
Consider the appeal and feasibility of your chosen category, leveraging your creative skills while assessing the market demand for your desired type of NFT. Additionally, ensure that the NFT file format you choose is compatible with the platform you plan to mint and sell your NFT, as different NFT platforms may have specific requirements or restrictions on supported file types.
Regardless of what type of NFT you create, owning the rights to an NFT is essential because it establishes ownership, authenticity, and the ability to control and monetize the digital asset represented by the NFT. The legal dangers of not owning the rights to your NFT and selling it include potential copyright infringement claims, disputes over ownership and authenticity, and the risk of legal action from the original rights holders.
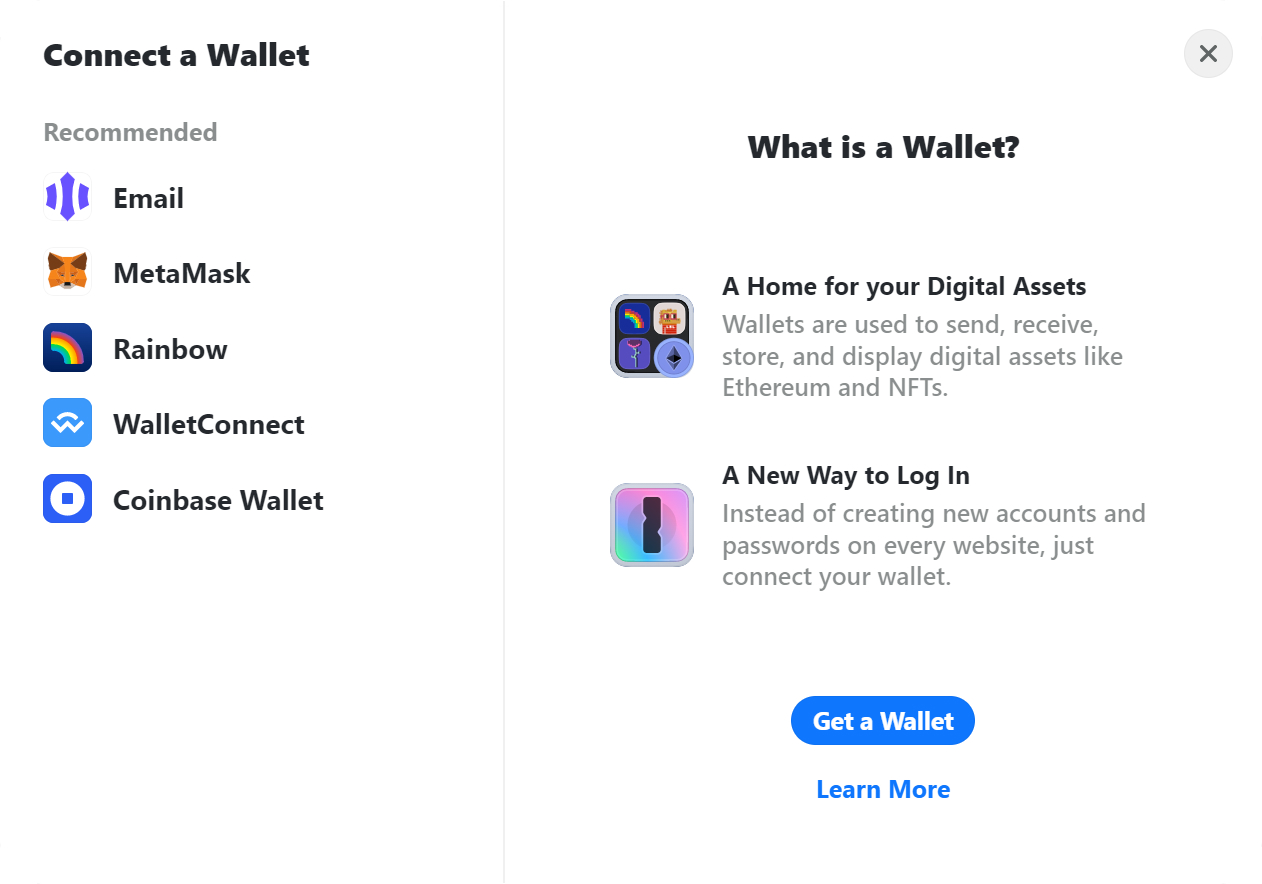
Step 2: Get a Crypto Wallet

A crypto wallet is crucial step before you create NFTs
Before getting started, we recommend getting a crypto wallet. Setting up a crypto wallet before creating an NFT helps to securely store the NFTs you make, manage your ownership rights, and facilitate transactions on blockchain platforms.
While getting a crypto wallet can be beneficial and helpful to the process, with Bueno, you can use your email to sign into Bueno, and we will create a crypto wallet for you. This we, we can help facilitate the creative process of creating an NFT collection.
For those who are interested in getting a crypto wallet, it's important to note that it's a software or hardware tool that allows individuals to store, manage, and interact with their cryptocurrencies by securely storing their private keys, enabling transactions, and accessing blockchain networks.
Here are some popular cryptocurrency wallets you’ll want to consider:
For maximum security, you’ll want to invest in a hardware wallet instead of a digital wallet like the Ledger Nano S Plus, which means all of your digital assets are not sitting in the cloud, which can be more vulnerable to cyber-attacks.
Whatever wallet you choose, conduct thorough research and choose a wallet that aligns with your specific requirements and provides a secure storage solution for your cryptocurrencies.
Step 3: Add Cryptocurrency to your Wallet

Most NFTs are minted on the Ethereum blockchain, which require transactions to be paid in Ether (ETH), the native cryptocurrency of the Ethereum network. When you mint an NFT, you typically pay a gas fee (transaction fee) to process the minting transaction on the blockchain, which is paid in cryptocurrency.
To buy cryptocurrency, you can use one of these popular cryptocurrency exchanges:
These exchanges provide a platform to buy popular cryptocurrencies like Bitcoin (BTC) or Ethereum (ETH). Some exchanges also offer the option to purchase a variety of altcoins (alternative cryptocurrencies).
Regarding the specific cryptocurrency coins you should buy to mint an NFT, it depends on the requirements of the NFT marketplace you intend to use. Ethereum (ETH) is the most common cryptocurrency for minting NFTs on platforms like OpenSea. But, it is also important to note that marketplaces support 99% of networks where NFTs are minted, and minting your NFT collections with Bueno allows creators to have flexibility with the networks they choose.
So while Ethereum is one of the most popular crypto choices, there are cheaper and different cryptocurrencies that creators will choose instead of Ethereum. Some of these examples are:
In any case, it's crucial to review the marketplace's guidelines and requirements before deciding which cryptocurrency to acquire for minting your NFT.
Step 4: Make your NFT collection

Turning your NFT projects into a reality.
Creators who are looking to start creating an NFT collection can now take advantage of an incredible, easy-to-use NFT platform like Bueno to develop thousands of NFTs in minutes!
Bueno is a no-code tool for digital collectible creators. It’s an all-in-one NFT toolkit with an NFT generator that allows you to go from generation to mint in a few easy steps.
1. Create your NFT art using a design tool with layers like Photoshop, Procreate, or Figma. In the example below, we created this collection on Figma.
2. As you can see, we have different components like heads, bodies, eyes, and more! All nicely organized and separated.

3. Depending on your design tool, you must export it with specific settings, which is explained in more detail here.
4. Go to bueno.art. On the top right, click Create Now.

5. Connect your wallet.
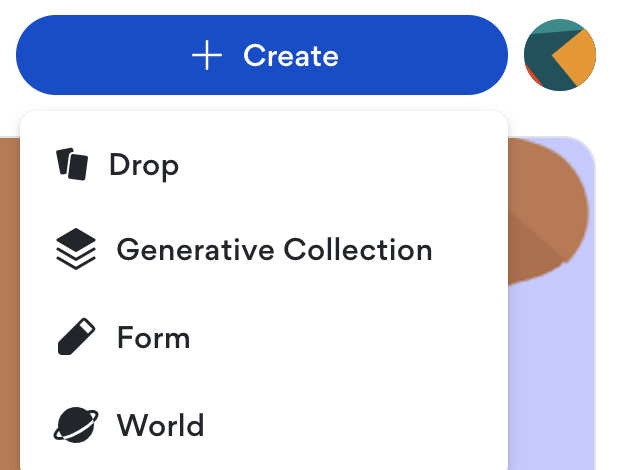
6. Once your wallet has been connected and logged in, go to Create > Generative Collection.
7. Upload your assets by dragging and dropping or choosing a folder.

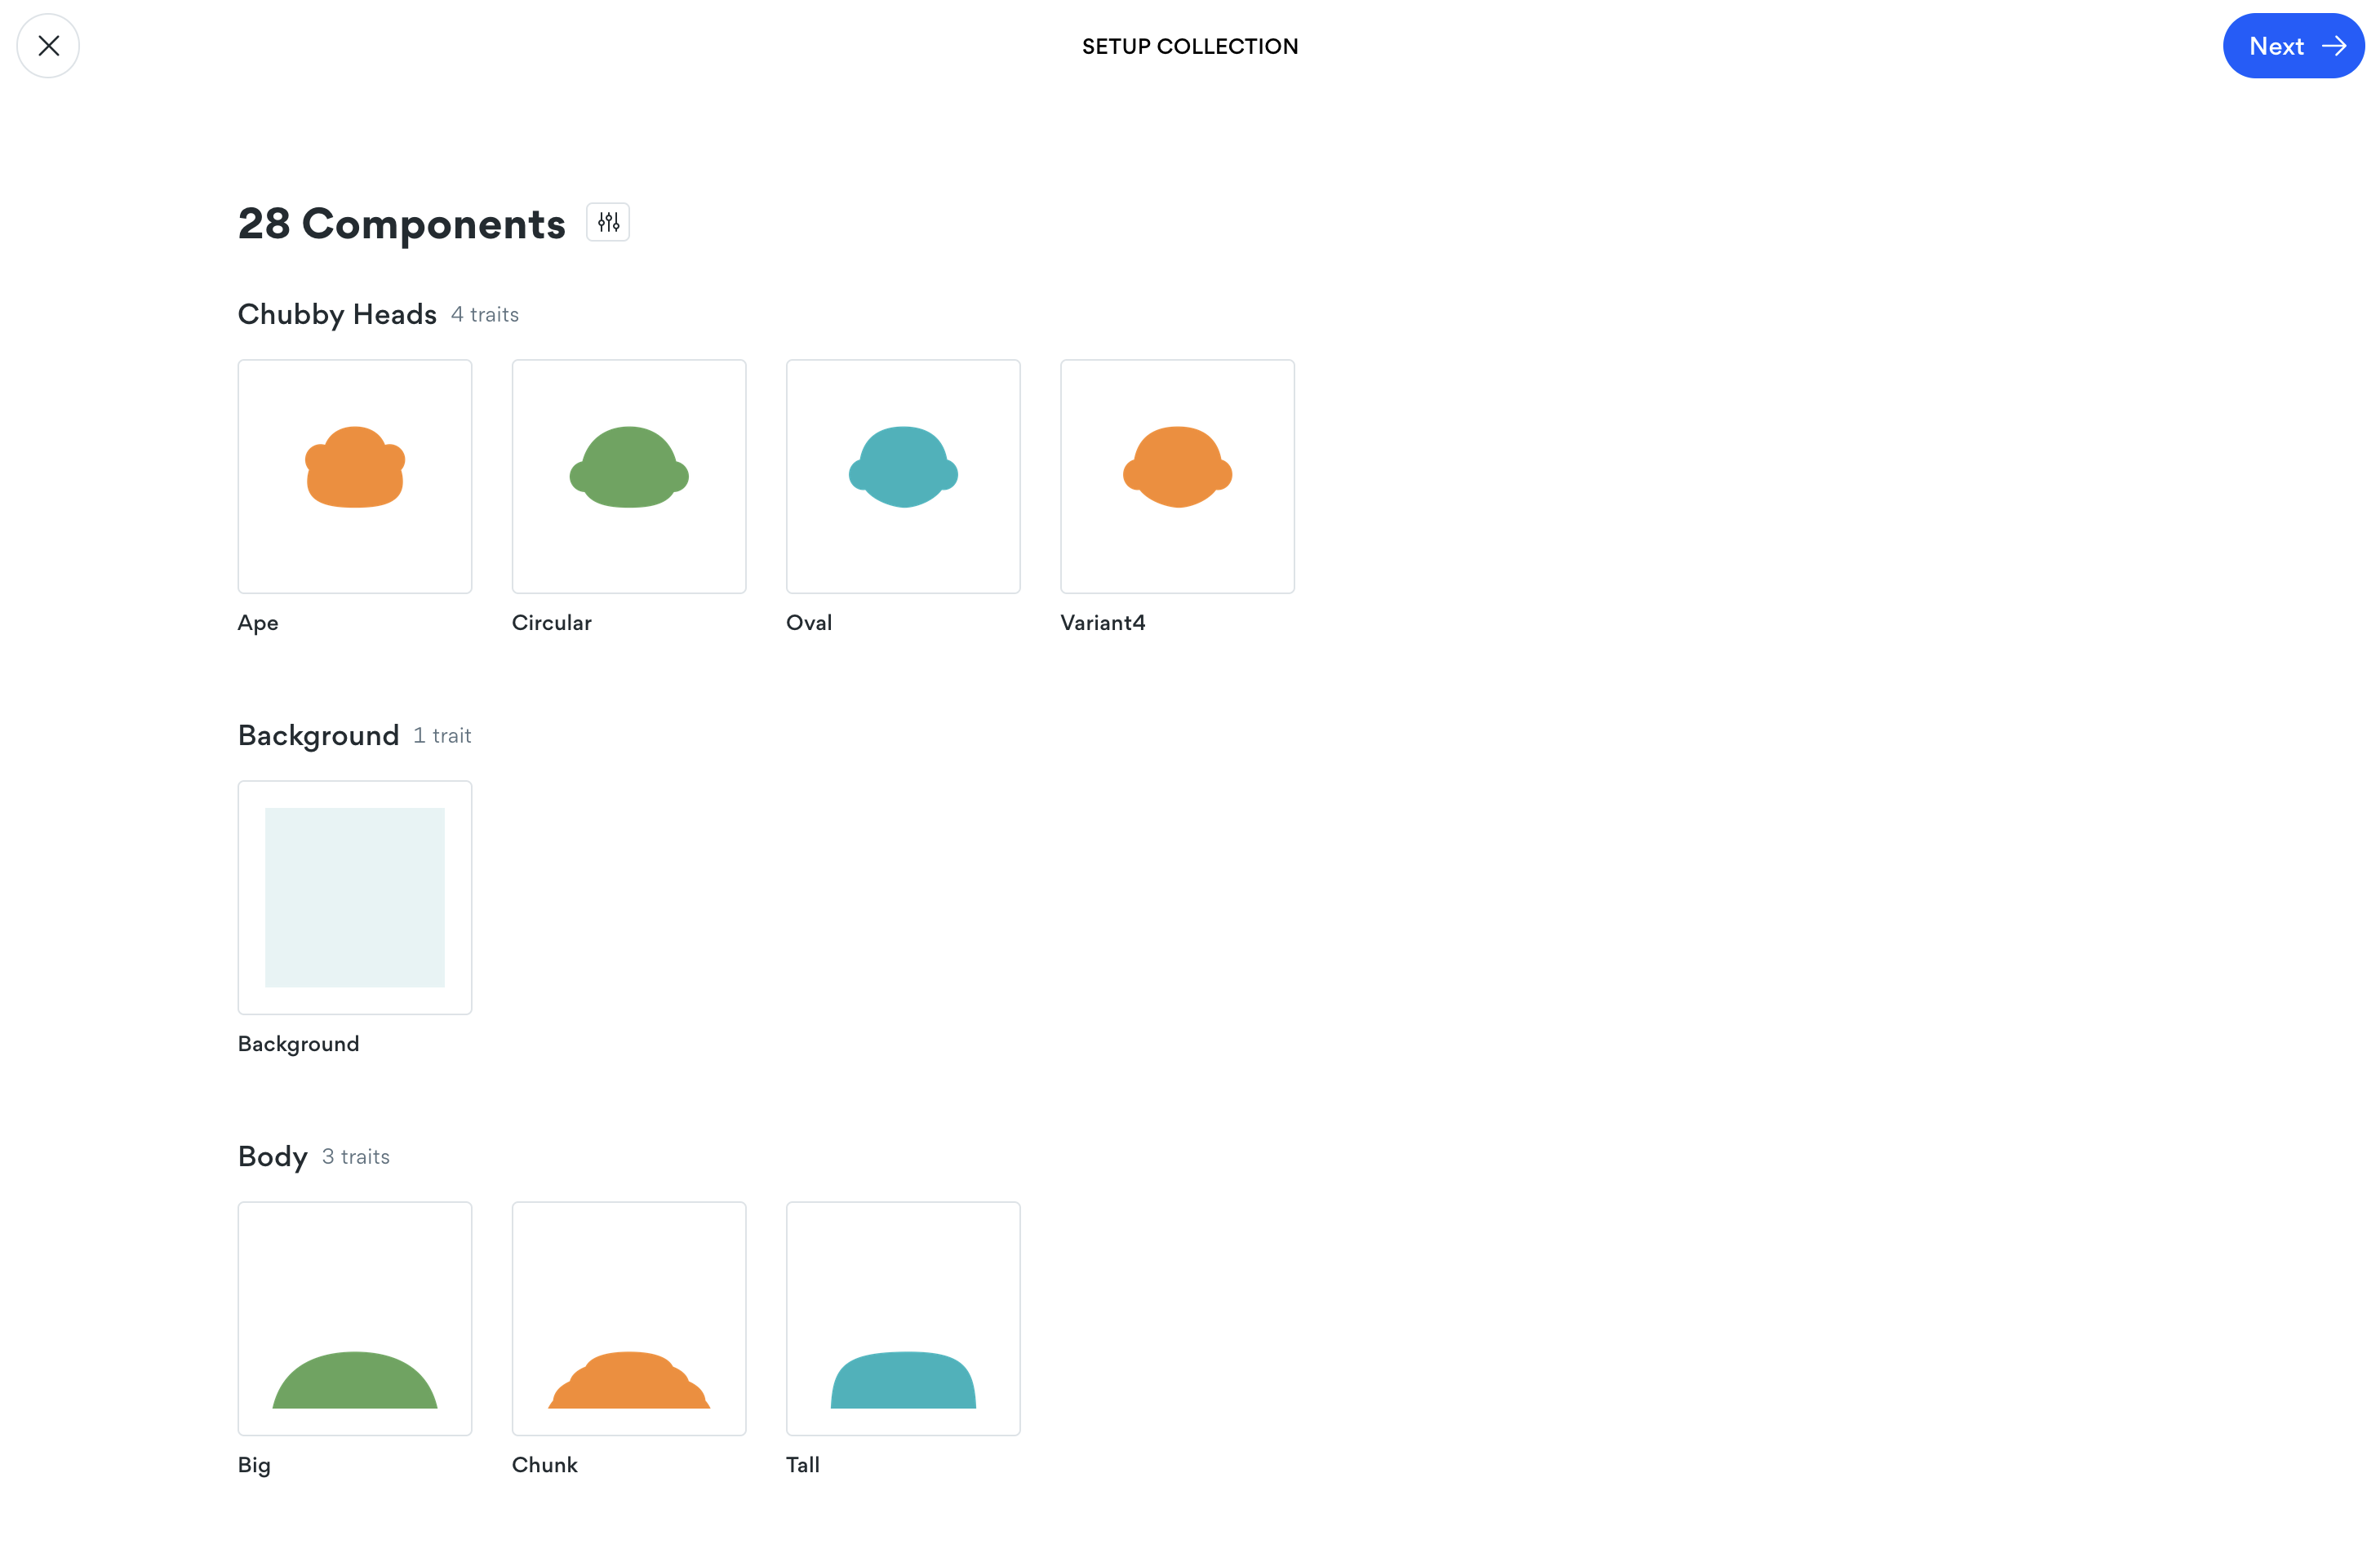
8. Once you have uploaded your collection, it will appear in “set up collection." Make sure that everything appears correctly!
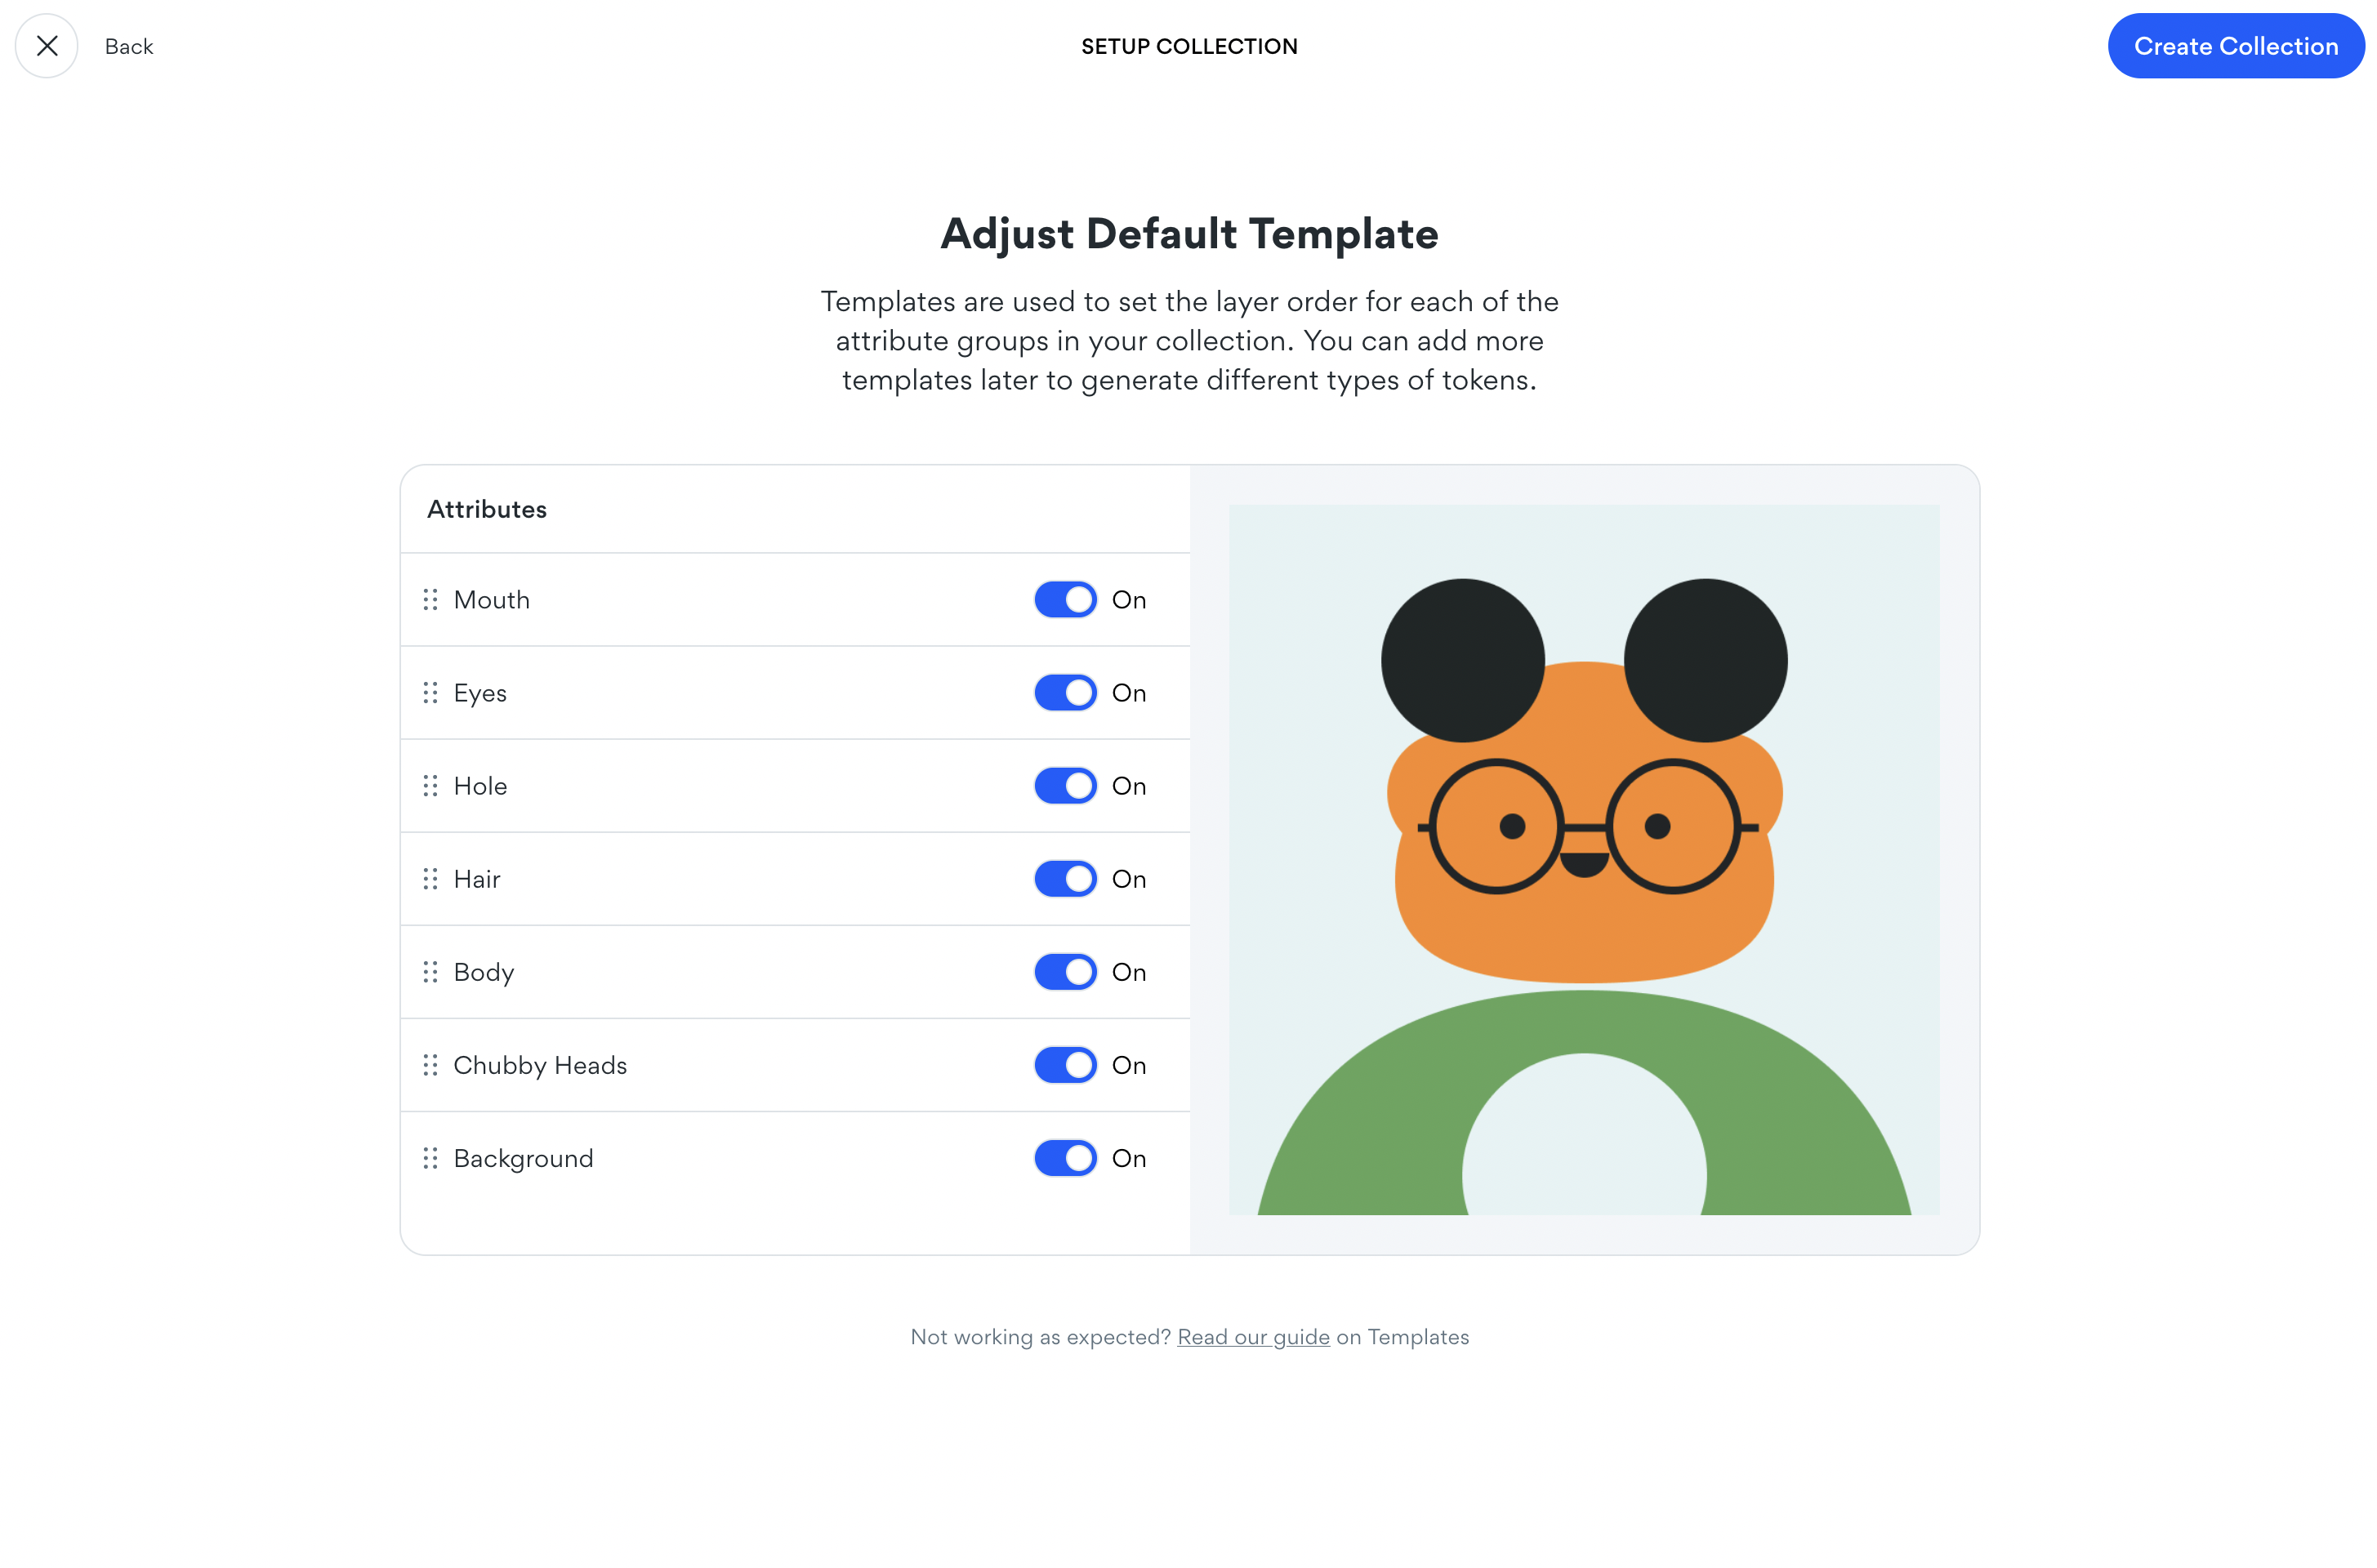
9. Now it's time to adjust your template. emplates are used to set the layer order for each of the attribute groups in your collection. You can add more templates later to generate different types of tokens. You can learn more about this here.
10. When you select the collection, Bueno will automatically take you into Preview to ensure your collection looks the way you want it to.
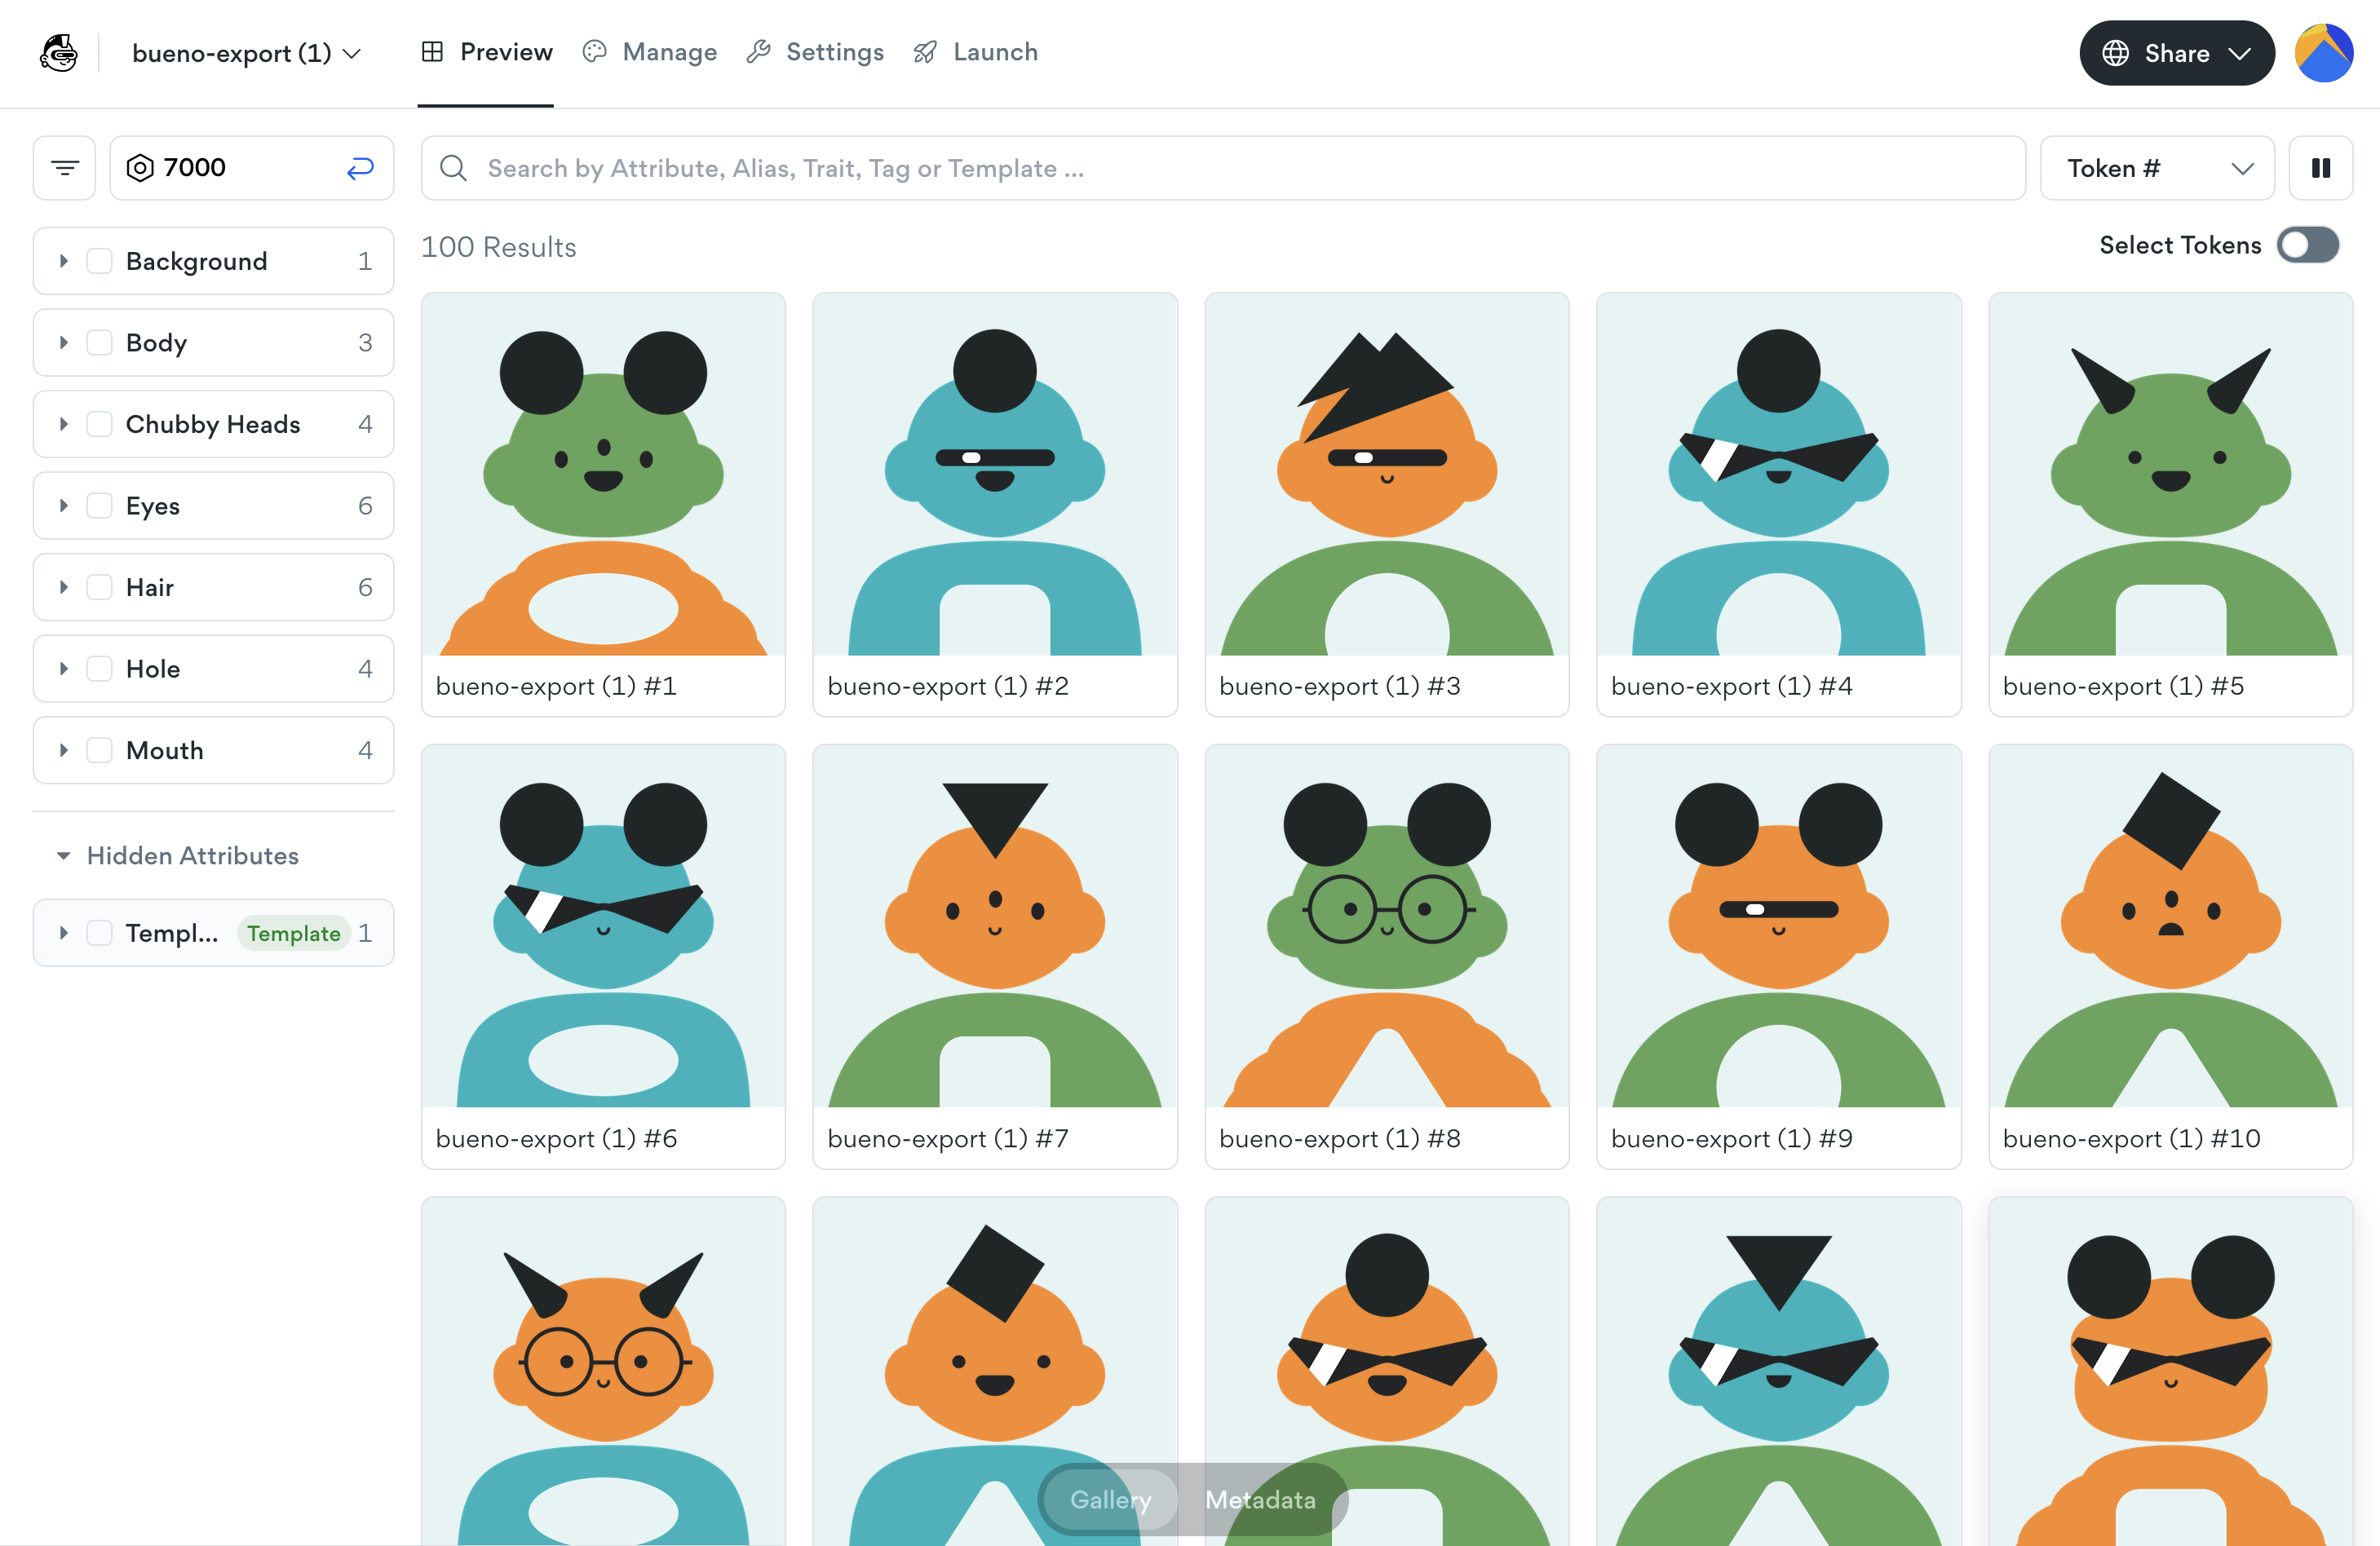
11. Be sure to explore the other tabs at the top such as “Manage” and “Settings” to create attributes, custom tokens, tags, rules, and more to ensure everything is to your liking.
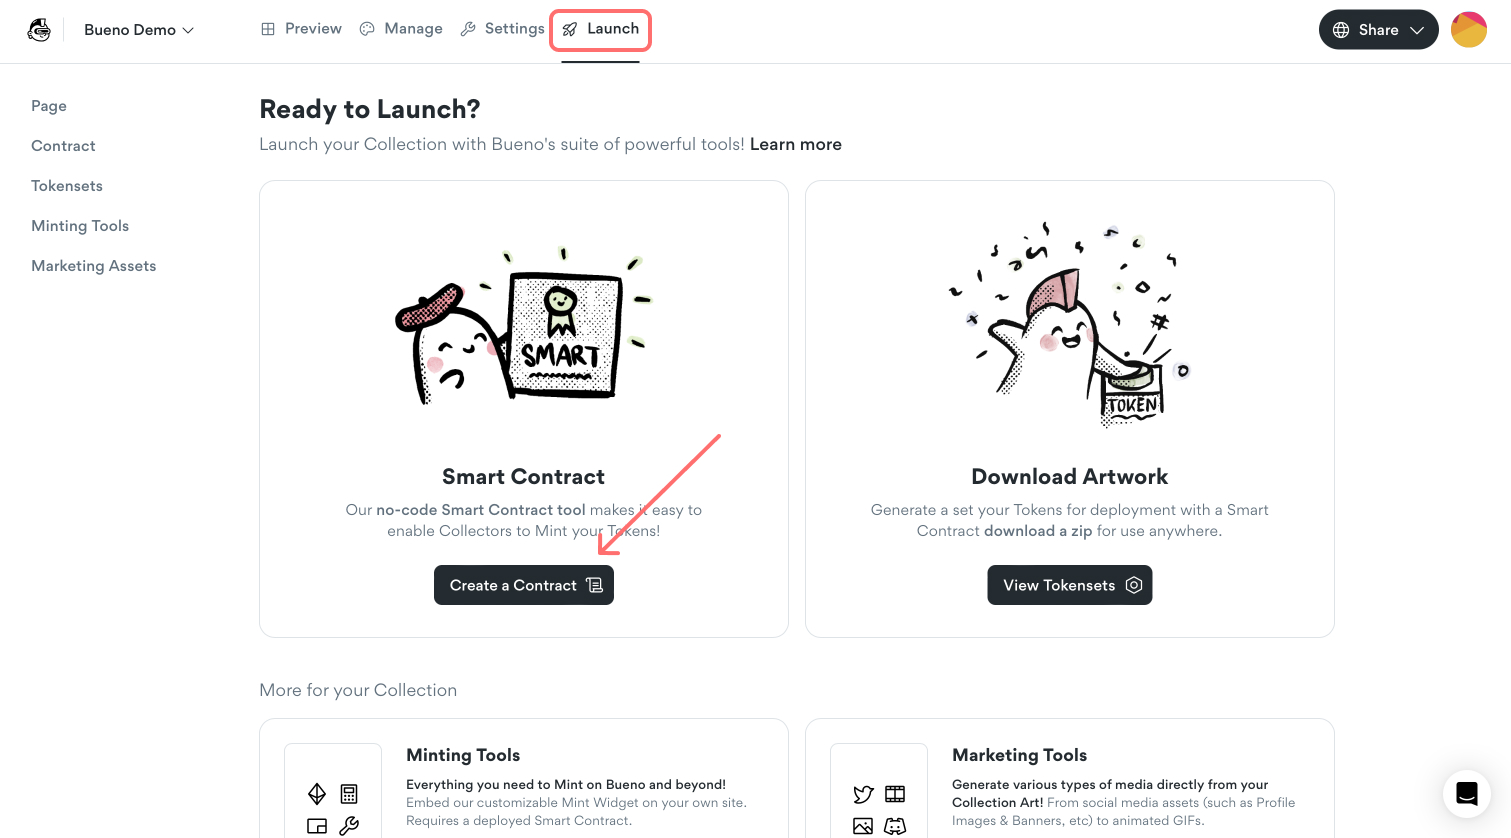
12. When you’re ready to mint your collection and start selling your assets, go to “Launch” at the top.
13. As a final step, we recommend you head to our Bueno School course to see some more details about what you can do with the Bueno Generator.
Step 5: Create a Smart Contract
Next, we need to create a Smart Contract. Creating and minting NFTs often involves transactions and ownership rights that need to be enforced, and a smart contract provides an automated and secure way to handle these processes without relying on intermediaries.
You can think of a smart contract as a digital contract that automatically carries out agreements between people or organizations. This digital contract that runs on a blockchain, which is a secure and transparent network.
Once the conditions in the contract are met, the smart contract executes the specified actions without the need for intermediaries, like banks or lawyers. It's kind of like having a trustworthy computer that ensures everyone involved follows the rules and keeps things fair.
Creating a Smart Contract with Bueno is easy and can be done in a few steps.
1. In the Launch tab, click “Create a Contract” to make a Smart Contract specifying pricing, royalties, and more.
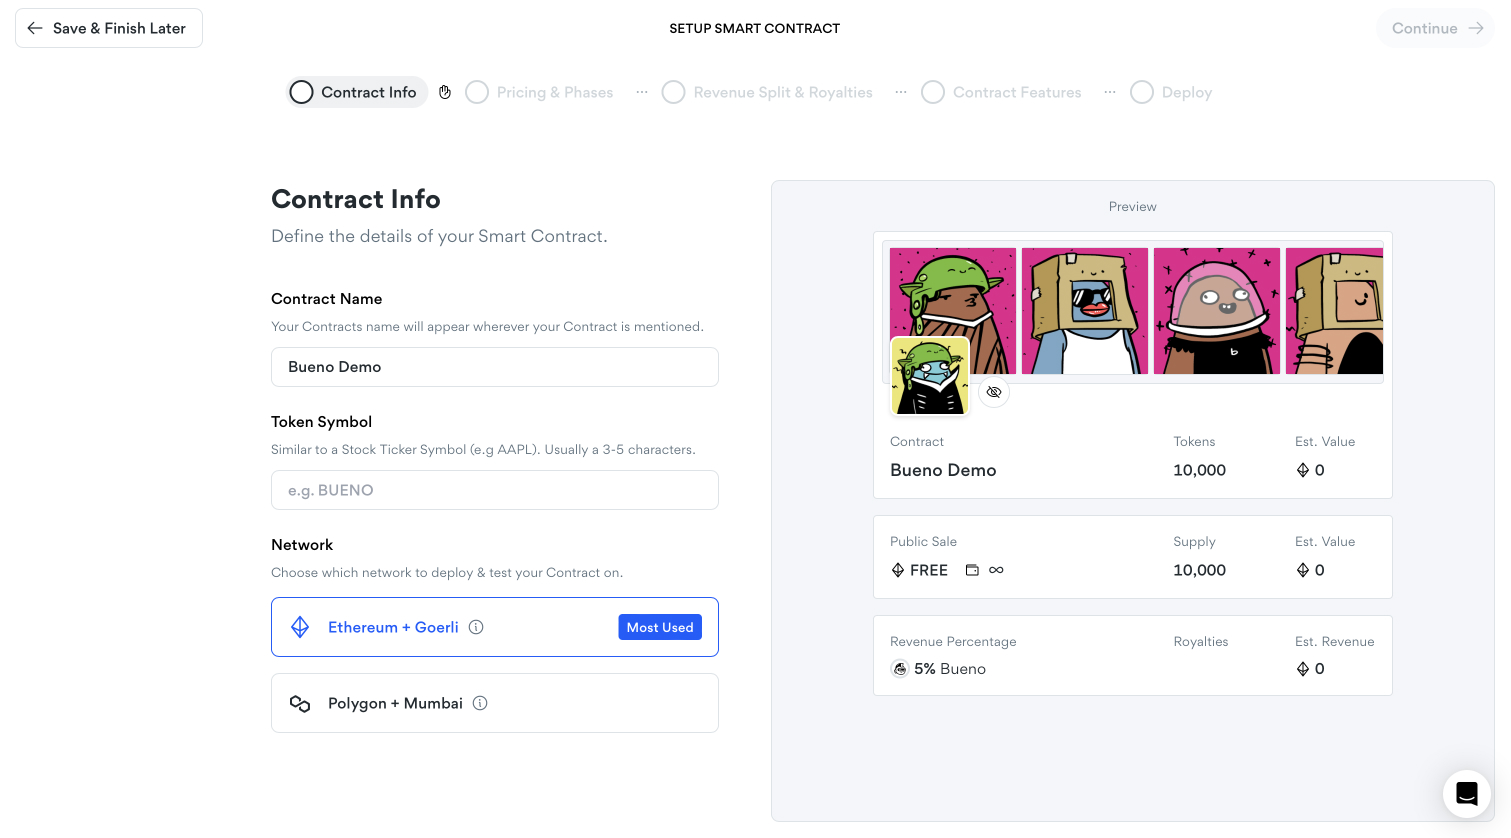
2. Start by defining the details of your smart contract by giving your contract a name, naming your token symbol, and specifying which network you would like to deploy your contract on (Ethereum or Polygon). Click “Continue” on the top right.
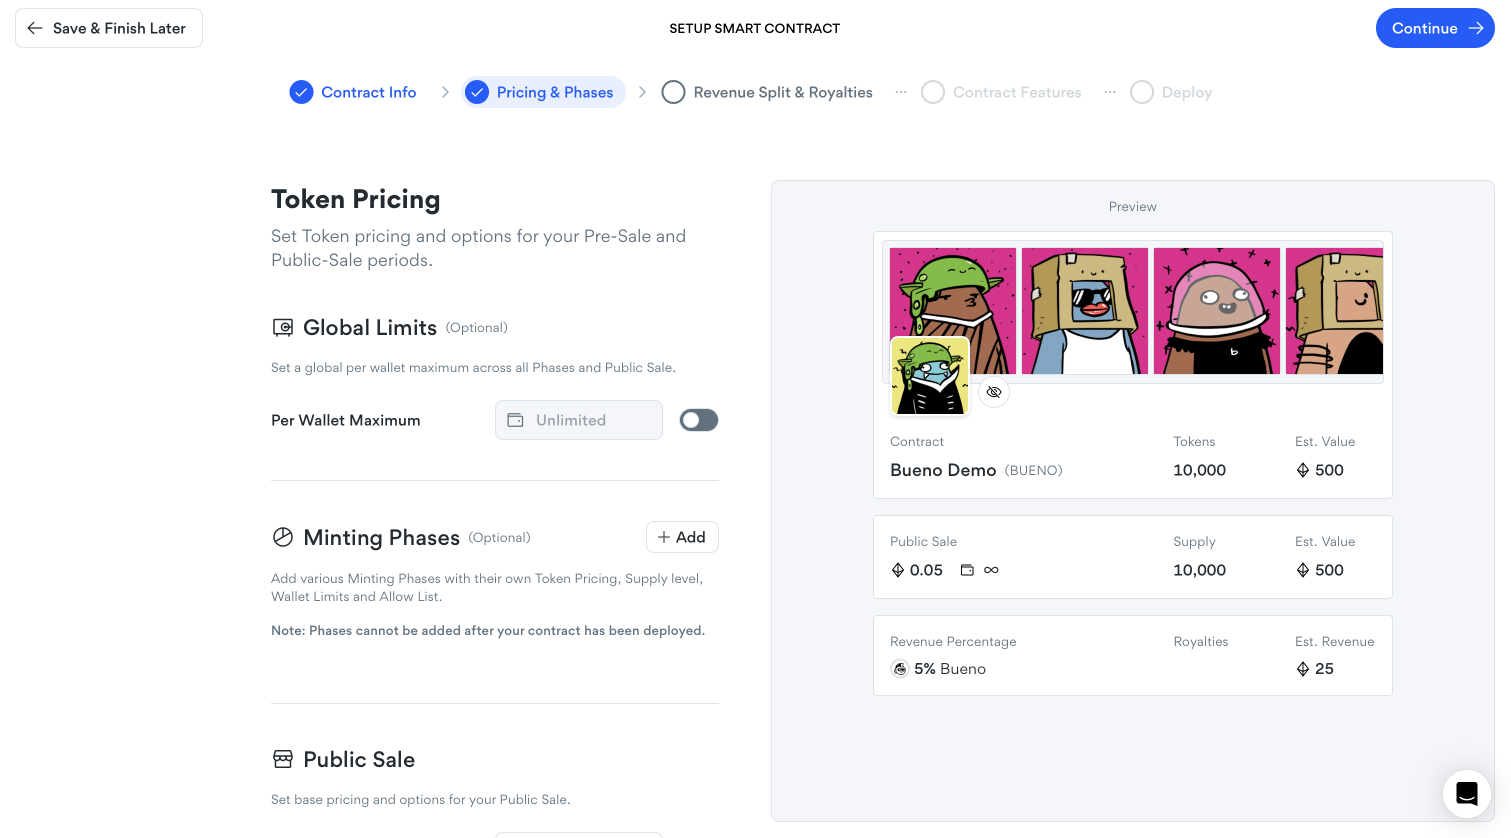
3. Determine the price of your token by setting a global limit and base price. If you want, you can add a Mint Phase in which you can give prizes to specific people.
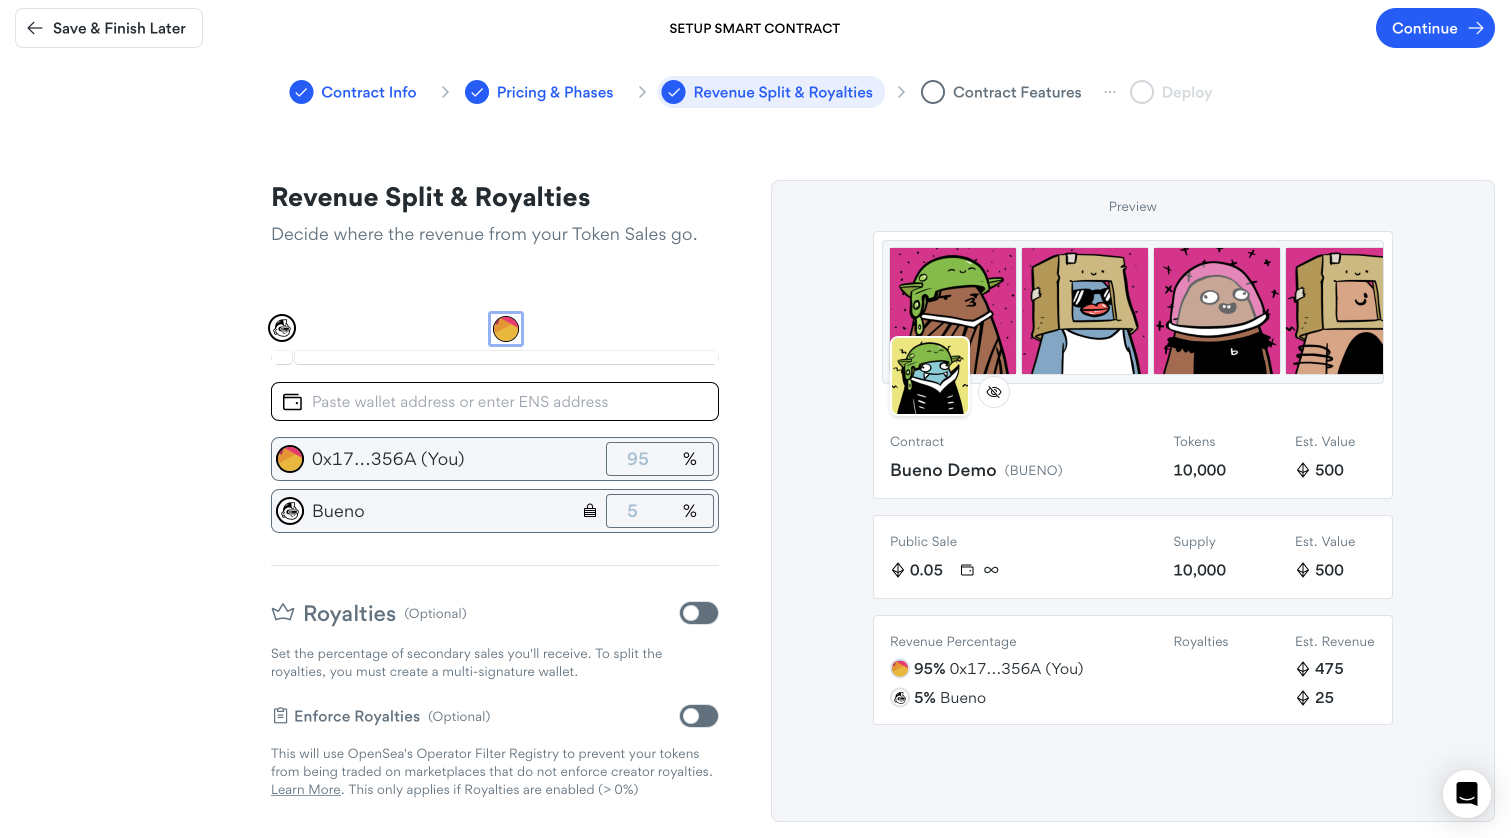
4. Decide how you would like to split the revenue from your token sales. If you would like to give someone a split of the revenue, feel free to paste their wallet or ENS address and specify the percentage they will receive. Optionally, you can toggle on the “Royalties” tpdetermine how much you will receive for secondary sales. It is important to note, howver, that setting royalties will give marketplaces a "suggested" percent - but won't necessarily be enforced.
5. Decide if you would like to Delay Reveal or make your token Burnable. Delayed Reveal allows you to put a placeholder image until you decide to reveal it to build anticipation. Burnable Tokens allows token holders to burn any tokens they own.

6. You’re ready to deploy! You can deploy your contract to Testnet which is a network for testing and experimentation with no risk of real funds on the main blockchain. Note that in order to mint NFTs, you will need to pay gas for deployment. Testnet deployment is recommended to ensure your Smart Contract’s features are working as expected, but if you do not want to test, select “Skip this step.”
7. When you are ready, pay the gas fee and deploy your contract to Mainnet which consists of live networks on the blockchain and is accessible by the public. This is where anyone can buy your to

Step 6: Customize Your Mint Page
Before minting your tokens and officially going live, it’s important to customize your collection page! Here is how to do this.
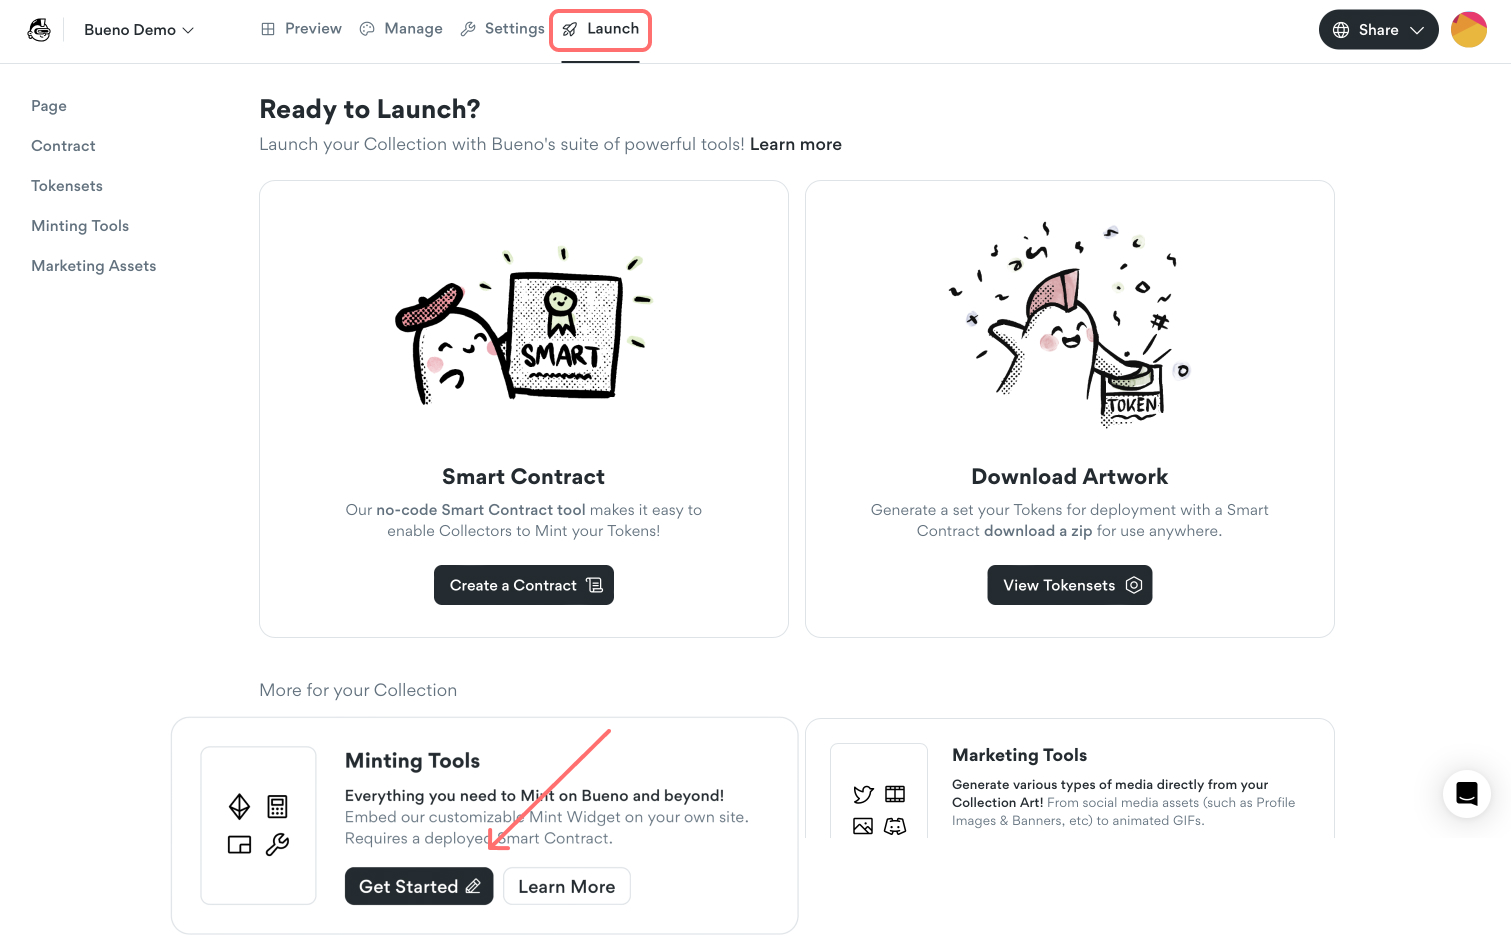
- Go to Launch > Minting Tools at the top.
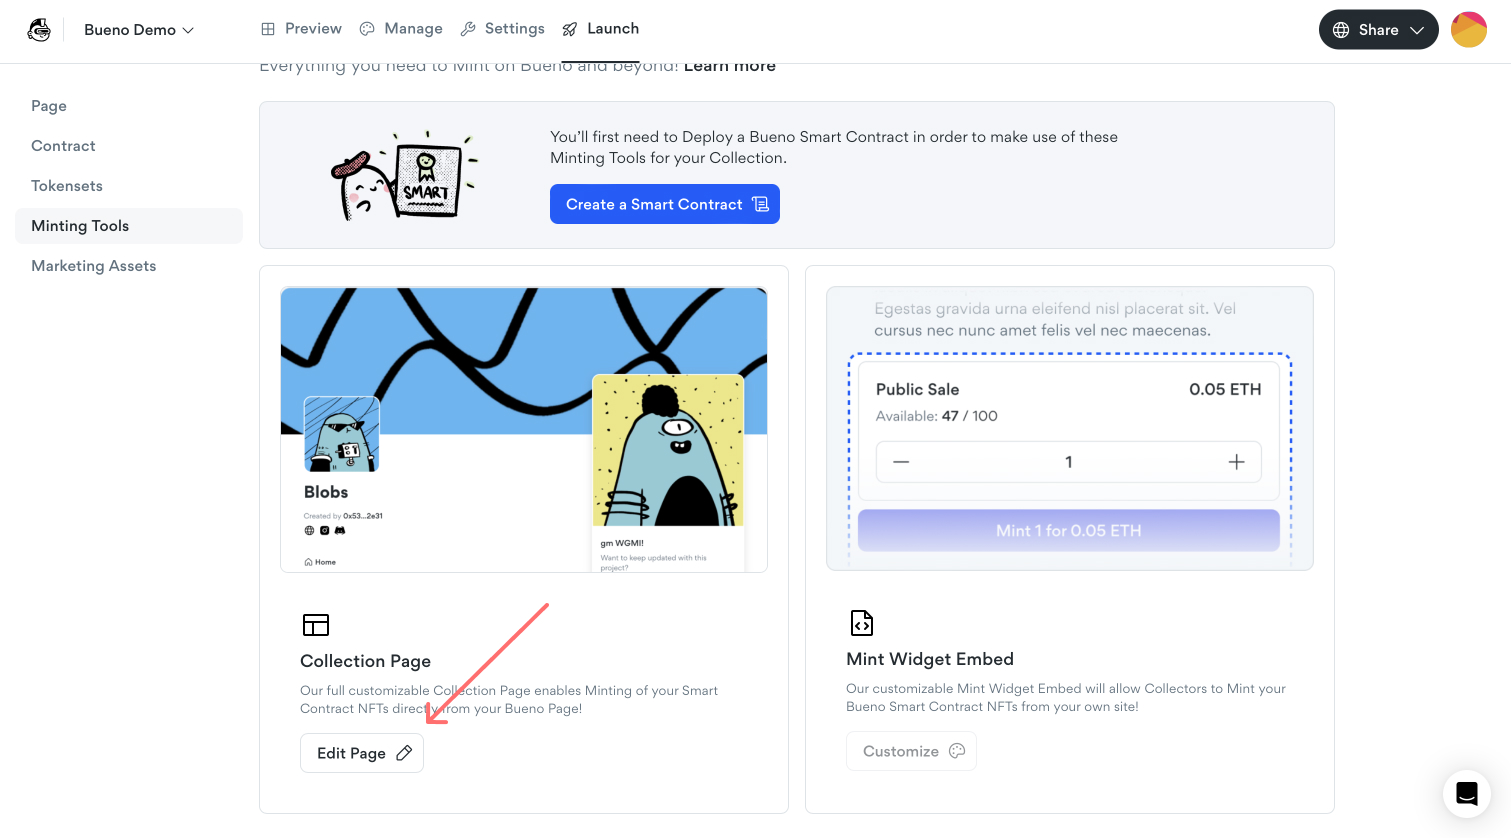
- Under “Collection Page,” go to “Edit Page.”

- You have now entered the Page Editor! Feel free to drag and drop a banner image and change your logo.
Step 7: Sell Your Tokens
Everything is set! You’ve made your NFTs and deployed your Smart Contract. The final step is to go public by minting so others can collect your tokens!
NFT minting allows you to establish ownership and create a unique, verifiable digital asset that can be bought, sold, and traded on NFT marketplaces. Here's how to start your minting phase with Bueno.
- Under “Launch,” select “Contract."

- Follow the instructions through "Contract Info" all the way to "Deploy."
- Follow the instructions to deploy your contract to mainnet, then open your mint!
Congratulations! You have successfully started to sell your tokens! Make sure to share your collection page so collectors can mint your tokens! You'll be able to see your sales on the dashboard, plus people will be able to see your tokens on OpenSea as they get minted!
Conclusion
Creating an NFT collection has become easily accessible, even for beginners. With these step-by-step instructions and the availability of user-friendly tools like Bueno, you’ll be minting NFTs in no time!
With its no-code approach, Bueno empowers digital creators to navigate the NFT space effortlessly, allowing you to mint, manage, and monetize your artwork without the need for technical expertise.
As the NFT ecosystem continues to evolve, Bueno stands as an essential resource, enabling creators to showcase their talent and participate in this exciting digital frontier.
FAQ
Can I create an NFT on my own?
You can create NFTs using a blockchain platform that supports NFT creation or an NFT generator like Bueno. You must follow the platform's guidelines, upload digital content, and pay the required fees to mint the NFT.
How much does it cost to create an NFT?
The cost to create an NFT can vary depending on your chosen marketplace. Typically, fees are associated with minting an NFT, ranging from a few dollars to several hundred dollars, depending on gas fees and platform-specific charges.
Is it free to create an NFT?
No, creating an NFT typically incurs costs. Fees are associated with minting an NFT, which varies depending on the blockchain platform used, including gas fees, transaction fees, and potential platform-specific charges. However, NFT platforms like OpenSea and Rarible allow you to mint NFTs without paying fees (also known as “lazy minting”).
Is making NFT profitable?
Making NFTs can be profitable for some NFT creators, as they have the potential to generate income through sales and royalties. However, NFT value can vary significantly depending on demand, the popularity of the creator, and the overall market conditions.